With this in mind, either bedlining or just flat black spray paint were the only two options left as far as I was concerned. Well, I still want the Oatmobile to look cool, so that rules out the rattle-canning.... Bedliner it is!
Bedlining a surface has inherent advantages (and disadvantages) over simply repainting:
Advantaged include;
Thicker than paint (protection)
Cheaper than repainting (spray paint is still cheaper though)
Not as much prep work is required and prepping does not need to be perfect
Easy to apply
Offers corrosion resistance
Weatherproof
Impact protection (i.e. hail damage)
Won't scratch
Touch ups are a breeze
Nothing is perfect however... disadvantages include;
Thicker than paint (overheating might be an issue if used on hood)
This stuff stinks while being applied and during drying
Not a factory finish (if that is something you care about)
It adds weight to the vehicle
With that being said, here is what you need for the project;

Pictured materials;
The bedliner (duh!)
Non fibrous roller (the one pictured came from Home Depot)
Masking/painter's tape
Masking paper
Sandpaper (I used 220 grit)
Sanding block for a smooth finish
Prep wipes or tack cloth for final cleanup before application
Non-pictured materials;
Nitrile gloves for handling the prep wipes or tack cloth
Roller pan
Ventilated space or a respirator
I went with a roll on bedliner over spray cans because I did not want to mask off the whole vehicle or take the hood off the Jeep. The 1 quart can I bought is sprayable with a HVLP paint gun or a sprayer available from a bedliner kit but I wanted to go for the cost effective route.
Surface preparation is everything with painting and I carried some of that methodology over to this project but keep in mind that opposite from painting, the surface does not need to be perfectly glass smooth. Bedliner leaves a rough texturing over the surface it is applied to so gouges and even small dents will be filled in by the liner. I will recommend however, being generous in masking off areas that you do not want to be coated because as you are rolling, there will be some spattering and liner flying off the roller.
Here is how I masked off and sanded the hood;

Sanding comes next. Use a block and scuff the crap out of the surface to help promote adhesion. This may be a step that is not totally necessary, but I like to go the extra mile to ensure that the end product is just how I wanted it to be. As you can see in the above picture, you can still see the paint (don't go down to bare metal) and the discoloration and oxidation from before the project started. This is all fine as I stated earlier, the surface prep does not need to be 100% perfect.
After sanding you need to clean the surface of all contaminants and dust/debris. I used a shop-vac (Hoover GUV) to get the hood to where you see in the above picture but that was not enough. You need a prep wipe or tack cloth to get the rest of the dust off and after wiping the surface down, this is what the hood looked like (if you compare the above and below pictures, you will see how much dust was left over);

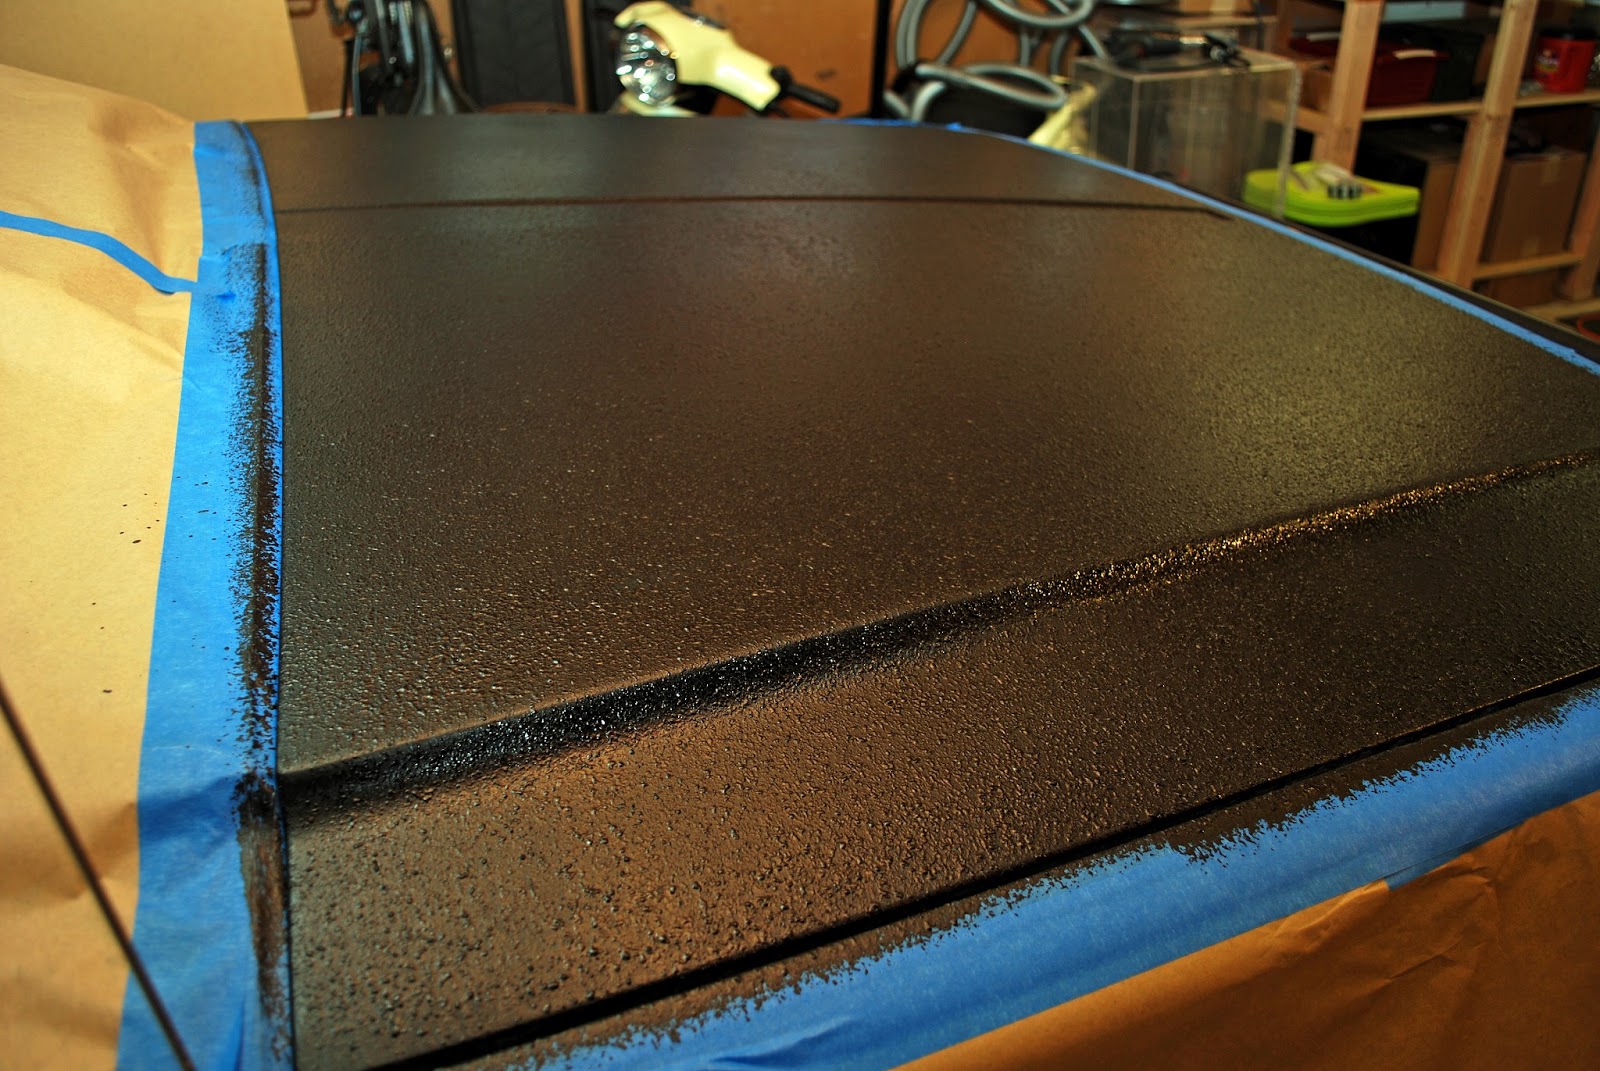
Once the surface is dry, you can start! Shake the can for a few minutes and pour some into a roller pan and get started. Work in lines and use light coats (this project took 3 coats to get where I wanted it to be). Each coat takes about an hour to dry depending on the temperature, airflow, and humidity.
This is what it looked like after the first coat (note that you can still see the green paint in many spots);

After some waiting, and subsequent even coats, you should be done! Here is how the Oatmobile turned out;

And after I removed the masking materials;

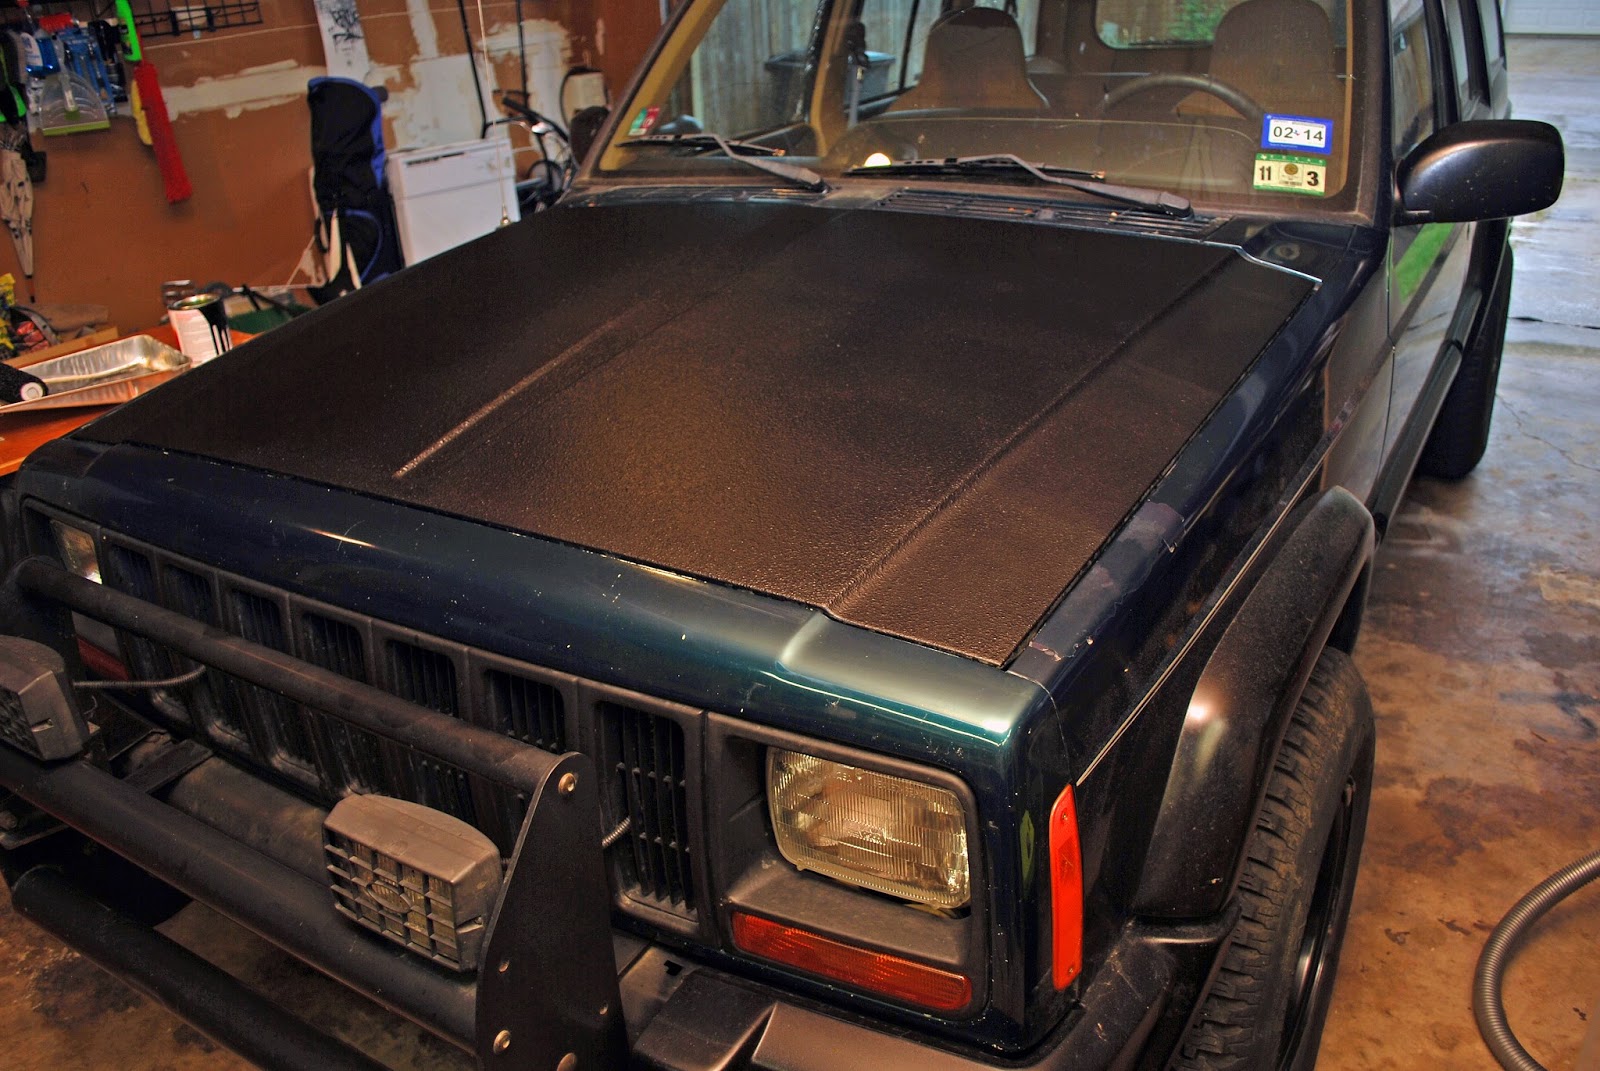
I am happy with the way it turned out! As an added bonus, when I have my roof mounted lightbar on (more on that later), there is no reflection off the hood into my face! I only used half of the can to do this project so there is plenty left over for some small projects.
No comments:
Post a Comment