
Supplies needed for this project that I purchased for this project and a few more from www.KnifeKits.com;
100 ct. bag of 8-8 black eyelets- $12.95
10 pack of black #8 Chicago screws- $3.95
Hand eyelet setter for #8 eyelets- $11.95
Sheath making kit, Kydex .080" thickness- $11.95
2 Belt clips black finish- $1.85 ea.
J-hook mount with hardware- $5.95
1 extra sheet of .080" black Kydex- $4.80
1 sheet of gunmetal grey Kydex- $7.20
Stuff I purchased elsewhere for this project;
Coping saw with blades- $7
2 Foam garden knee pads- $5
Stuff that I already had for this project;
Heatgun
Lighter
Drill with a 1/4" bit
Hammer
Wood (for press, I used shelves from an old bookcase)
Razor blade
Dremel tool
Quick clamps (4 at a minimum)
Gloves (Kydex gets hot)
A ceramic tile to heat up the Kydex on
All in all, I spent $74.45 for the materials and tools that I did not have already, but if you take into account that I plan to make a few more holsters/sheaths/mag pouches, this will be well worth it considering that a custom holster alone will cost you anywhere between $50 and $100 each and I now have enough supplies to make about 3 holsters, 2 sheaths, and maybe a mag carrier.
Before you get all willy nilly and heating up the Kydex, come up with a plan first. What do you want the end product to be? What type of attachments will you use? How versatile do you want it to be? I wanted something that could be used for right handed people as well as lefties like myself, either mounted to a belt or carried inside the waistband for concealment. I did not want it to be too big so I went with a "taco" style sheath (you fold it over like a taco... pretty self explanatory). next you need to figure out how big of a piece of Kydex you need to do the project;

As you can see above, I gave myself enough material to be able to roll the knife over to the other side and still have about 3/4"-1" left over on the sides. Sizing Kydez is a breeze, just take a razor blade and a straight edge and score a line where you want it to be and it just breaks off like a really sturdy Kit-Kat bar.
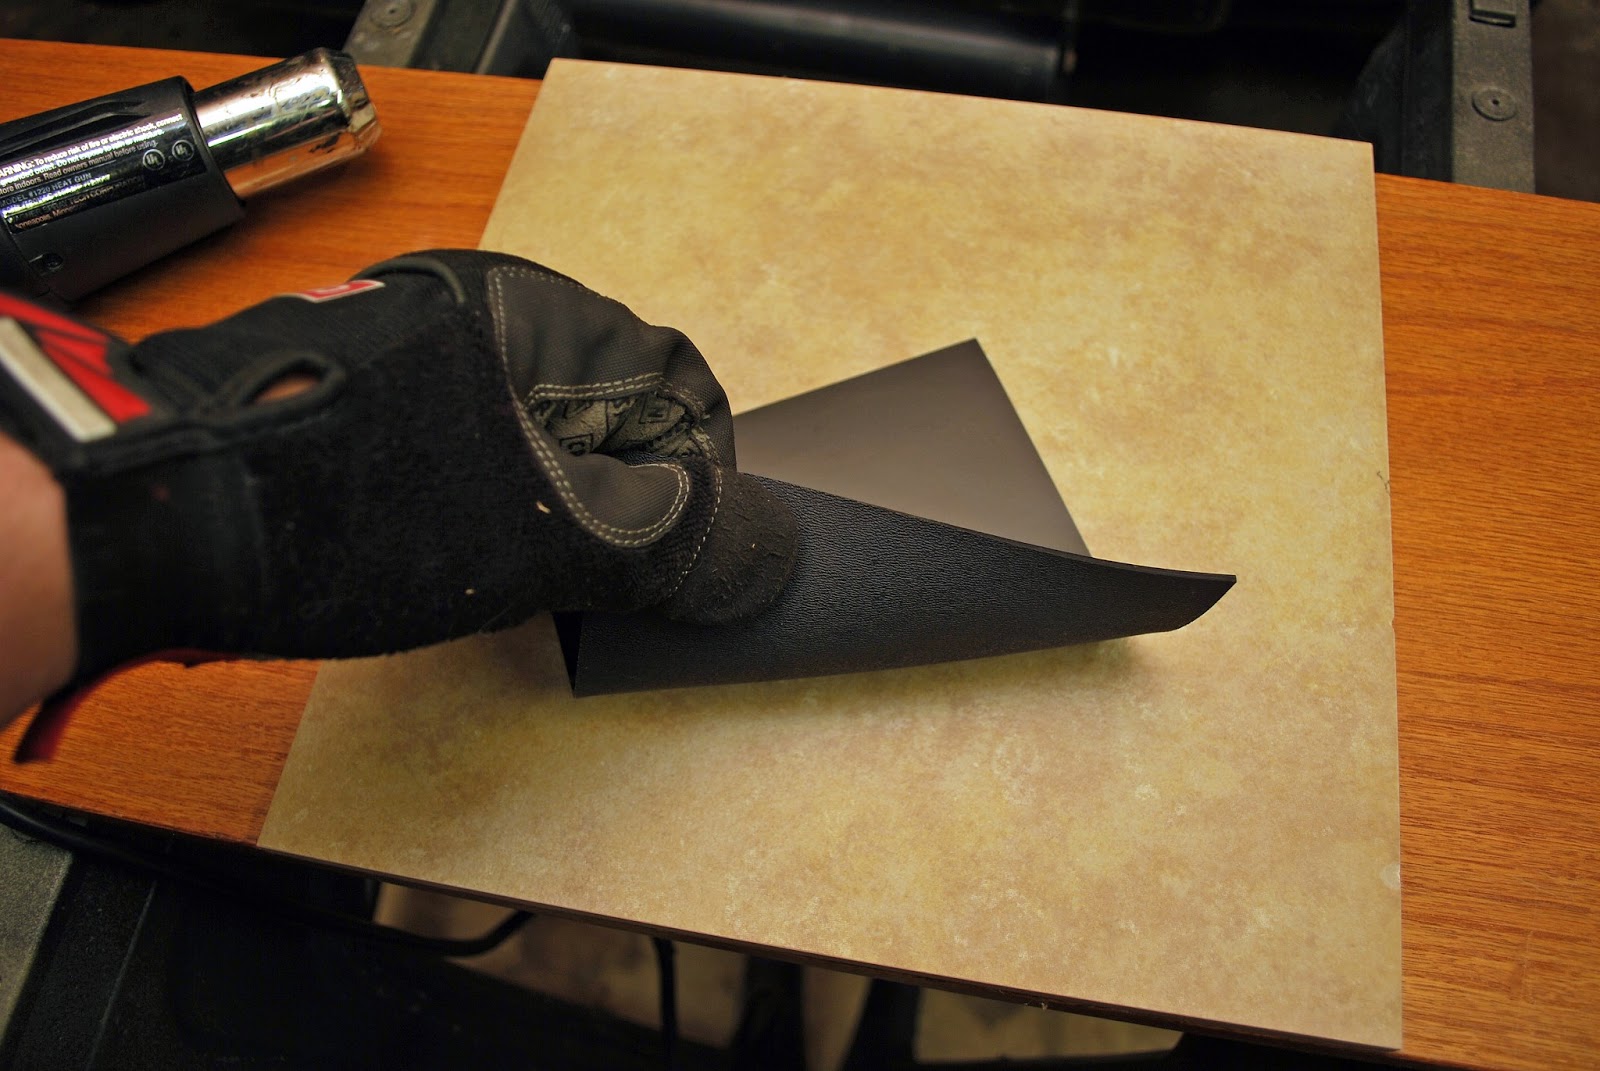
Now that you have the right size piece of Kydex, it is time to heat it up. Put some gloves on and place the piece on a ceramic tile or other heat-proof material and start heating it up evenly with a heatgun. You can burn the Kydex (I did), so be careful to keep the heatgun moving to evenly heat up the Kydex. Your sheet is sufficiently heated up once it becomes pliable and bendable as shown bellow;
Once you are to this point, quckly place the knife on the Kydex, bend it over like a taco and get it where you want it then put it in the press and clamp that sucker down tight!

Speed is the key here. As the Kydex cools down, it becomes harder to form and stays in the shape it was left in. A press forces the material to conform to the item placed in it. If you are too slow, it is okay, you can reheat and retry as many times as you need to get it right! Once you have let it sit clamped down in the press for at least 10 minutes to cool off, you can take it out and see how you did;

This is how mine came out (minus the rivets of course, I got a little ahead of myself and forgot to take pictures!). If it came out like you wanted with the retention that you desire, then you are ready for rivets. if not then no worries, just keep trying!
Riveting seems easy enough but there is a method to it. Spending the time to plan here makes all the difference. Rivet spacing is paramount and is key to what types of attachments you can use on the sheath. 1.5" is the spacing that I used as this allows me the flexibility to use Blade-tech's attachments as well as G-code's RTI hanger (well, two of the three studs). I started right bellow the choil and went down the blade from there until I got to the tip of the blade. I am not super satisfied with the way my riveting came out with the eyelet setter that I had purchased, I feel that spending a little extra money to get a better riveting tool would go a long way.

In the above picture you can see some of the definition of the blade and the choil (where the sheath gets all of its retention from).
Once you are all riveted together, it is time to trim off the excess material and shape the sheath to your liking. I used a coping saw with a fine toothed blade and after that was done, I smoothed the edges by sanding with my dremmel tool and then finally polishing the edges with a polish wheel and some compound.

The above picture is what it looks like all finished up. It is not the prettiest thing out there by any means but it is functional and is miles better than the sheath supplied with the knife in the first place. To show you some of the flexibility that proper planning offers you, look at the types of attachments that I can use with this setup;
Blade-Tech Tek-Lok setup for right-handed belt carry

Belt clip from Knife Kits setup for right-handed belt carry or left-handed IWB carry

There are many options to how you can mount this sheath, the above pictures are just a small sample. I am pleased with the way that this sheath came out and it was easy to do as well as cost effective. Stay tuned for more updates on working with this cool material as well as many other fun DIY projects here on Tactical Oatmeal!
No comments:
Post a Comment